Every woodworking or DIY enthusiast has thought of making a wooden clock at some point.
Wooden clocks are impressive art pieces that look great in both offices and home spaces.
Wooden clocks are fun and simple to make. Whichever the design you select, you can get playful and use your woodworking skills to make the most of it.
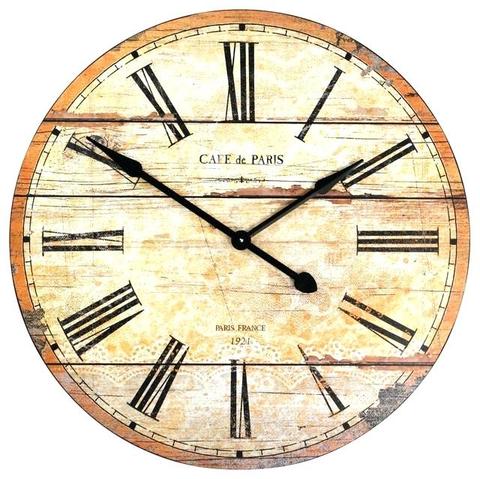
This project will focus on making the antique wooden clock below:
What you need
- A piece of wood from your hardware store
- Clock mechanism
- Pencil
- Permanent marker
- Wood router
- Chisel
- Marker
- Keyhole Hanger
- Ruler
- Drill bit
- Square Ruler
- Sandpaper
Step one – Find the diameter of the wood
Measure the width of the piece of wood that you will be using for the project. Use the ruler to measure the entire piece and then divide the dimension into two and make a dot at the central point.
If you have an idea of the size you would desire, make sure you select it from the hardware store.
Step two – Sketch an outline for the clock motor
The clock motor is the “brain” of the clock. Therefore, you ought to consider its position before making further steps. Usually, it is placed at the center point of the clock at the back of the wood panel.
Start by deciding the back and front sides.
Next, locate the center and drill a hole.
Place the motor’s tip on the hole and trace out the motor so that you can get a clear outline of the wood you need to chisel out.
Step three – Confirm that the outline is measured correctly
Now that you have traced the shape on the wood, you can measure the four sides towards the edges to ensure that the motor is at the center. If it isn’t, make appropriate changes. Both professionals and hobbyists should try to get this step right.
Step four – Chisel out the outline
It is now time to take out the draft and make room for fixing the motor. To do this, start by making several holes within the framework using the drill bit. Take caution not to make very deep holes.
You can now chisel out the wood on the outline. Us a hammer and chisel to carve the wood out. Keep on chiseling until all the wood material is out and deep enough for the motor to fit.
Step five – Make a hole at the center of the motor outline
Measure diagonally off the four corners and settle for a location that is at the center of the motor outline.
The center hole is where you will fit in the clock motor shaft. Once you have settled for the center and are sure about it, you can then drill the hole.
Step six – Insert the clock motor
Before inserting the motor, clean up the well and measure it to ensure that it has the correct depth at all the points. Once everything is in the clear, place the motor in the outline you made.
The shaft should go into the hole. Insert a pair of double A battery in the motor to aid its operation.
Step seven – sand the clock face
Smooth the clock face using the sandpaper.
Step eight – Trace the clock outline
Use a template of your choice, that is, the size and shape you desire and outline it for the clock numbers.
Step nine – Install the clock hands
Start by installing the hour hand and then the minute hand.
The second hand should be the last. You should fit the hands at the center of the clocks; on the hole, you made when you first measured the wood’s diameter.
Step ten – Draw the numbers
Start by drawing the primary numbers, which are 3, 6, 9 and 12 using a pencil because you can make corrections easily. You can trace them with a permanent marker after settling for the positions.
After making the four major pointers, proceed to mark out the other points precisely on the clock’s face.
Remember to start with a pencil and use a marker once you are sure of the position. You can play around with your creativity by using a permanent marker of your choice.
Step eleven – Check for proper alignment of the hour/minute hand with the numbers
With your finger, spin the minute hand for the twelve hours to ensure that the hour hand points correctly to the numbers.
Step twelve – Install the keyhole hanger
The hanger should go to the top of the back side of the hook. Measure a centered line for the installation of the keyhole hanger. Attach it using the small screws.
Your clock is now ready! Congratulations! You have now finished making the clock, and you are at liberty to hang it up the wall or do whatever you please.


